Keto-Friendly Bento

Don’t you hate it when you’re on a special diet and you can’t find a meal out?

I do. It’s one of the reasons I am so dedicated to making bento. Those small one-meal containers have not only been the saving of my pocketbook, but also my diet compliance.

The thing is, it takes a bit of creativity to ensure that you’re getting a good, packable meal that’s within your diet parameters as well as satisfying.

A keto-friendly bento for train travel

I got this particular bento box from Niche for Beach and I adore it. (I also wasn’t paid to write this, though if they wanna send me another such box…) It’s sturdy, has lids that seal pretty well for each compartment, and can go in the dishwasher, which is something of a rarity for bento boxes.

This is much larger than your usual Japanese bento box, but I’m okay with that, as it means you can have a meal with a small salad — something one does a great deal when eating keto. (Yes, people on a keto diet eat their veggies. It’s not all bacon-wrapped fried butter).

When planning a nice, portable keto meal, you need to remember a few things. You need to have enough fats. This meal has some nuts, some cheese, a few bacon bits and dressing for the salad, so that’s all covered. You need to have your protein. In this case, the cheese and boiled eggs cover it. Chicken is also a good thing to use here, as it’s good cold and cooks up easily. You also want to have different textures for a good mouthfeel. For this bento, we have the nuts, the crunch of the salad and the softer textures of the cheese and eggs. Oh, and you want veggies. Salad covers this dandy. For extra nutritional punch, you could add darker greens like spinach and such, but I’m going to admit right here that romaine lettuce is less expensive and lasts longer in the fridge, so that’s what I run with a lot more often.

While strawberries are kind of on the higher end as far as keto-friendly foods, I tend to include them in my lunches, as it satisfied my “dessert” desires pretty well.

If you’re interested in seeing some ideas for good, keto-friendly bento, let me know. I’ll be glad to post more.

It’s Too Hot for Coffee!

It’s that time of year when people say, “It’s too hot for coffee.” These people do not understand coffee and are not to be trusted.

My grandmother loved coffee, and she liked it amazingly strong. There was no such thing as a day that was too hot for coffee. Her theory was that on a hot day, you should drink a hot cup of coffee, as it would warm up your insides and make you feel cooler.

I am far more effete than my stern grandmother, and once the temperature gets above a certain point, I really do not want more than a single hot cup of coffee in the morning. After that, I want a cooler and more refreshing drink.

Being a Virginian, I often do enjoy iced tea. However, my Yankee husband isn’t much of a fan.

What we can agree on is a nice class of sweet and creamy iced coffee.

A friend of my encouraged me to try the cold-brew method for making coffee. You know what? For iced coffee, it is utterly perfect. It is also quite easy.

I’m using a two-quart Mason jar for this, but you can really use any container.

Take about 40g (call it a heaping third of a cup if you’re measuring by volume) of medium ground coffee. You don’t want fine ground, or you’ll have a very bitter result.

I confess I didn’t measure the water properly. My favorite coffee ratio seems to be 1:19 coffee to water. This is a few milliliters more than that, but I just filled up the jar with water here. I am confident the result will be fine.

Cap the jar, give it a good shake to mix up the grounds, and put it in the refrigerator.

Now we wait. Cold brew’s real disadvantage is that you do have to plan a little in advance. You should let this coffee steep in the fridge for at least 12 hours. In this example, it was more like 24, but who’s counting, right?
After 24 hours, I think this baby is well-steeped. Now, we need to get rid of the grounds.

You can strain the coffee any way you’d ordinarily strain anything with a coarse grind. Cheesecloth is dandy, as is any paper filter.

Because I already own a steel mesh filter and a Chemex coffee maker, it seemed to me to be ideally suited for the task.

And so it does!

Ideally, you’d store this coffee in a container in the fridge, but with my husband and I both drinking it, I’m not really going to bother. It’ll be used in an hour.

The advantage here is that cold-brewed means that you’ll have nicely mellow coffee that doesn’t become too diluted when you add some ice. A friend of mine pointed out that some people like to make coffee ice cubes to go with their drink. This is also an excellent option, but I did not do it for the experiment.

Iced coffee is lovely in the summertime. If you’re a coffee lover, do try it. And hopefully, Grandma won’t be too ashamed of my effete delicacy!

Dorm Rat Cooking: Beans and Rice

One of the things you find when you are living in limited space is that you have limited space to store food. I know – DUH!

Due to a slight miscommunication on how many cans of black beans we really needed for Taco Stew, I had an extra can of them lying around, along with a pepper that really needed eating up. It was a little wrinkly for a salad, but would be just dandy if you were cooking it. I also had some rice on hand, because if you eat rice, you should always have some on hand.

So… Beans and Rice.

I haven’t been doing many (okay, any) vegetarian meals here, mostly because I am a carnivore, but there are some vegetarian meals I am fond of, and this is one. It’s easy, it’s quick, it’s healthy, and it’s tasty.

To make this meal, you will need:

  • Sharp knife
  • Cutting board
  • Deep Skillet with a lid and heat source

One-Pan Beans and Rice

  • 1 15 oz. can of Black beans (Don’t try dry beans here. Takes too long to cook)
  • 2/3 c. rice
  • 2 c. diced bell pepper. (I happened to have red. Any color is fine)
  • ½ c. diced onion
  • 2 T minced garlic
  • 1 ½ c. stock (vegetable or chicken is fine. I used water and a bullion cube)
  • 1 T Montreal Seasoning. No, stop looking at me like that. The heavy pepper is good and it’s versatile. If you don’t have room for a big spice rack, this is something you want on hand.
  • 3 T olive oil

Heat the olive oil on medium high. Sauté the peppers, onions and garlic until the onions are translucent. Add the black beans and rice. Stir. Add stock and give it another good stir. Cover and reduce heat to a simmer. Cook for ~20 minutes.

I had planned for leftovers. Looks like there won’t be any. Which, given the tiny fridge, I am actually just dandy with!

Dorm Rat Cooking: A Fall Dish with a History

So, last week, I thought I’d try something with apples and leeks with pork in rosemary and red wine. Sounds great, right?

Well, that dish on top was what I did. I asked The Prince how he liked it and he shrugged. Since I’m making these meals at least in part because I want to post articles on my blog about them, I asked him what was wrong. His comment, “The pasta is okay and all, but you know that apples, onions and sweet potato dish you do in the Fall? I think that’s what this dish is really calling for.”

He was right.

The dish I do every fall? I slice apples, sweet potatoes, and onions, layer them in a dish with a bit of butter on top, cover, and bake. Delicious, and if you have an oven, I encourage you to try it. A friend of mine back over a decade ago brought it to a family meal once, and it really is very, very good.

Using The Prince’s inspiration, I adapted this to a one-skillet meal you’ll be sure to love. The pasta version is okay. The sweet potato version is All That’s Good About Fall is and like angels singing.

Equipment you’ll need:

  • Deep Skillet with a cover.
  • A source of heat that’s reliably even
  • A sharp knife
  • A Cutting board

Pork Chops Graced with Autumn Goodness

  • 1 pork chop for each person you’re serving. They should be reasonably thick.
  • 1 Medium apple, diced. I prefer the tartness of a Granny Smith to contrast with the sweetness of the sweet potato, but a firm, sweet apple would also be okay.
  • 2 cups sliced leeks
  • 2 cups sweet potato, cut into 2-inch cubes
  • 3 T olive oil
  • ¼ c red wine
  • 1 sprig fresh rosemary, or 2 T ground rosemary
  • Salt and pepper to taste

Heat olive oil in a pan on medium. Add sweet potatoes and cook ~10 minutes, covered.

They should start to be softer around the edges but still firm. Add leeks and apple with rosemary and cook another 5-7 minutes covered until leeks become tender.

Add red wine and pork chops, sprinkling with salt and pepper. Cook about 3 minutes on a side until cooked through.

Serve.

(The Prince insists that I must add the caution that one should not count on leftovers)

Dorm Rat Cooking: More Rice and Veggies

The old induction hot plate died, and while I was really irritated, I cannot say that ultimately, I was totally sorry. I was in a small town with a small-town Target and just had to buy something for cooking. I bought an Oster 12″ Titanium Infused Electric Skillet. I don’t ordinarily recommend products on this blog, but this one has been a good one for the past couple of weeks. It heats evenly, the non-stick coating is the real thing, and doesn’t take up an inordinate amount of space. I would say the one disadvantage is that unlike a burner, you can’t heat water for tea in it, nor would it really be good if you wanted a meal in a pot rather than a pan. I use a kettle to heat water for my pour-overs and for tea, so this isn’t a big deal to me.

That said, it is deep and is large enough to cook ample meals even for people with hearty appetites.

This meal is based more on memories of rice pilaf. Honestly, it was more about trying to use up what was in the fridge than being all special with the cooking. I was using up some small peppers I’d intended as easy veggies for lunches but really needed eating up and weren’t going to withstand being in a bento in a backpack for a morning. It is also a good one if you like rice, but don’t have a separate pot or rice cooker

Sorta Pilaf

  • 1 c. Rice
  • 1 lb chicken, diced
  • ½ c. broccoli crowns
  • 1 c. sliced red peppers (look, I like red pepper and broccoli. It’s a thing. One firmer veggie and another more delicate veggie would work here)
  • ½ c. diced celery
  • ½ c. diced onions
  • 3 T. Olive oil
  • 2 T. Minced Garlic
  • 1 ½ c stock (I used chicken, but anything flavorful should do)
  • 2 t. ground sage
  • Salt and pepper to taste

Sauté chicken and oil on medium for a few minutes until it starts turning white with a few pink spots still showing (I am sure there is a real culinary term for this. I just don’t know it). Add the onions and celery and sauté until the onions are tender and translucent. Add the uncooked rice, sage, and garlic, sautéing until the rice starts to brown a bit. Add chicken stock and cook on low for about ten minutes. Cover and stir occasionally. Add broccoli and cook another five minutes, then add red peppers and cook for another three.

Serve.

Dorm Rat Cooking: A boring stir-fry

This meal requires a little more equipment than the last few I’ve done.

To make this meal, you need:

  • Frying pan
  • Cutting board
  • Sharp Knife
  • A heat source
  • A way to make rice (I have a microwave rice cooker and a microwave)

Ingredients

Per person served:

  • .25-.5 lb diced chicken (thighs are good for this and cheap)
  • ¼ c diced onion
  • 1 T minced garlic (I use the stuff you squeeze out of a bottle when space is limited)
  • ¼ c thinly sliced carrots
  • ¼ c broccoli flowerets
  • ¼ c sliced red peppers (In reality, you can put almost any veggies you like in this, but you want ¾-1 c veggies per person)
  • 1/8 c Kikkoman Stir fry sauce (In real life I never do this, but make my own. When I have limited space in a kitchen, this stuff works great)
  • 2T oil. (I use Peanut oil for stir frys in Real Life, but for all-purpose cooking oil, olive works out great)
  • ½ c rice
  • 1 c. water

Cooking the rice

This little plastic microwave rice cooker does the job. Typically, I use two cups of water per cup of uncooked rice and microwave on high for 13-15 minutes. You’ll have to experiment with your own microwave, as power can vary.

Stir Fry

For the stir fry, you heat the oil first, then add the meat and aromatics (in this case onion and garlic. Fresh ginger is amazing in this, but I was being lazy). When they start sizzling (Call it five minutes or so), add the carrots. After a couple of minutes, add the broccoli. I don’t like broccoli too tender, so give it about three or four minutes, then add the peppers.

When the peppers are as tender as you like (not very, in my case) add the stir fry sauce. Heat it up for about a minute and a half, then serve over the rice.

Dorm Rat Cooking: Sausage Time!

Here we have another great meal when you have few utensils and little space. Make this delicious pasta dish in a deep-frying pan; it doesn’t even require a colander!

You only need the following kitchen equipment:

  • Heating source (Hot plate or camping stove. I’d even attempt it over a fire, but it’d need to be a hot one)
  • Cutting board
  • Sharp knife
  • Deep Pan

Basil Fettuccini with Sausage

(serves two. Scale up for larger party)

  • ½ lb Italian sausage, sliced
  • ½ lb Fettuccini
  • Handful fresh basil, torn or chopped into pieces
  • ½ large red pepper
  • ¼ c onion sliced fine
  • 2T Minced garlic or 2 cloves garlic sliced fine
  • 1 cup cherry tomatoes, sliced in half
  • 2 ½ c water
  • 3 T olive oil
  • ¼ c grated parmesan cheese

Drizzle olive oil in the bottom of the pan. Arrange ingredients according to the picture. The important thing is to have the pasta in the middle as flattened out as possible. Pour in water and turn on high heat. As the pasta starts to soften, you need to stir or shake the pan frequently. If you’re using something like Fettuccini, you’re going to need to cook it for about fifteen minutes. If you’re using spaghetti, you’ll want a little less water, and you’ll want to cook for less time. Be careful not to use something like angel hair or the sausage will never have a chance to cook thoroughly.

When the pasta is soft, and the water has thickened to more of a sauce, add parmesan cheese and serve.

This meal is easy and quick. You don’t need a lot of equipment, it uses fresh ingredients, and it takes less than half an hour. My kind of meal!

After we ate, I commented that it might be better if you browned the sausage first, then added the water and other ingredients. But still, quite easy and tasty.

Dorm Rat Cooking: Intro

I’d mentioned I was going to be cooking some meals in a very limited kitchen for the next few months. A friend of mine said it sounded like I was going to be a dorm rat, and I liked the way that sounded, so I went ahead and totally stole the expression for this series.

I’ll be experimenting with several different menus, and different kinds of equipment you can fit in a small space. These meals will not only work in a small, not very equipped kitchen, but in an RV, or other situation where you have little prep space and few burners. (I only have one).

For the meal I made tonight, you will need:

  • A hot plate of some sort.
  • A sharp knife
  • A cutting board
  • A deep pan with a lid (I bought mine at K-Mart for about 18 bucks. It has a Teflon coating and is steel, so it works with my induction cooker).
  • A sink to wash up. My sink is about the size of a bar sink.

I am going to be making a lot of one-pan meals over the next few months. The other utensil I will be making extensive use of is a crock pot.

Bratwurst and Potatoes

  • 1 lb bratwurst
  • 2 medium potatoes
  • ½ medium onion
  • 1 T minced garlic
  • 1 large red pepper
  • Salt and pepper to taste
  • 2 T olive oil

The key to this recipe coming out well is lower heat and patience. Heat the pan with some olive oil and add the brats. Cover and while they cook, prep the potatoes by dicing in 2-inch cubes. I didn’t have a potato peeler, so I just scrubbed them well and left the skin on. Hey, it’s more nutritious that way, right?

Add the potatoes and cook covered on a medium heat for about 15 minutes, stirring occasionally (especially if you’re not using a Teflon pan) or shaking the pan semi-frequently.

Add the onions and garlic, and cook covered another ten minutes, stirring or shaking occasionally. When the onions start to brown a little, and the potatoes are tender when pierced with a fork, add the peppers and cook uncovered for another three to five minutes, depending on how crispy you like your veggies.

This serves two to three people, depending how hearty your appetites. IF you’re cooking just for yourself, adjust volumes accordingly.

My husband’s comment was that this was <unprintable>ing delicious.

Frugal Cooking Tastes Better

I make stock from the turkey carcass every Thanksgiving. I love turkey stock and got a gallon of it this year — wonderful rich liquid gold, I tell you.

Instead of popping this right in the freezer, I’m going to put these bad boys in the fridge to let the fat rise and solidify. I know what you’re thinking. I’m doing that for low-fat stock, so I’ll be throwing it away.

Are you on CRACK?

Save that stuff. You want poultry and dumplins soup that will make you swear to be a better person for the rest of your life for just one plateful? Use the poultry fat instead of butter or oil for the dumplins and you’ll have a little bowl of Heaven.

Besides which, if I bought that turkey by the pound, I paid for that fat. Why buy extra butter, right?

Freeze Ahead Recipes

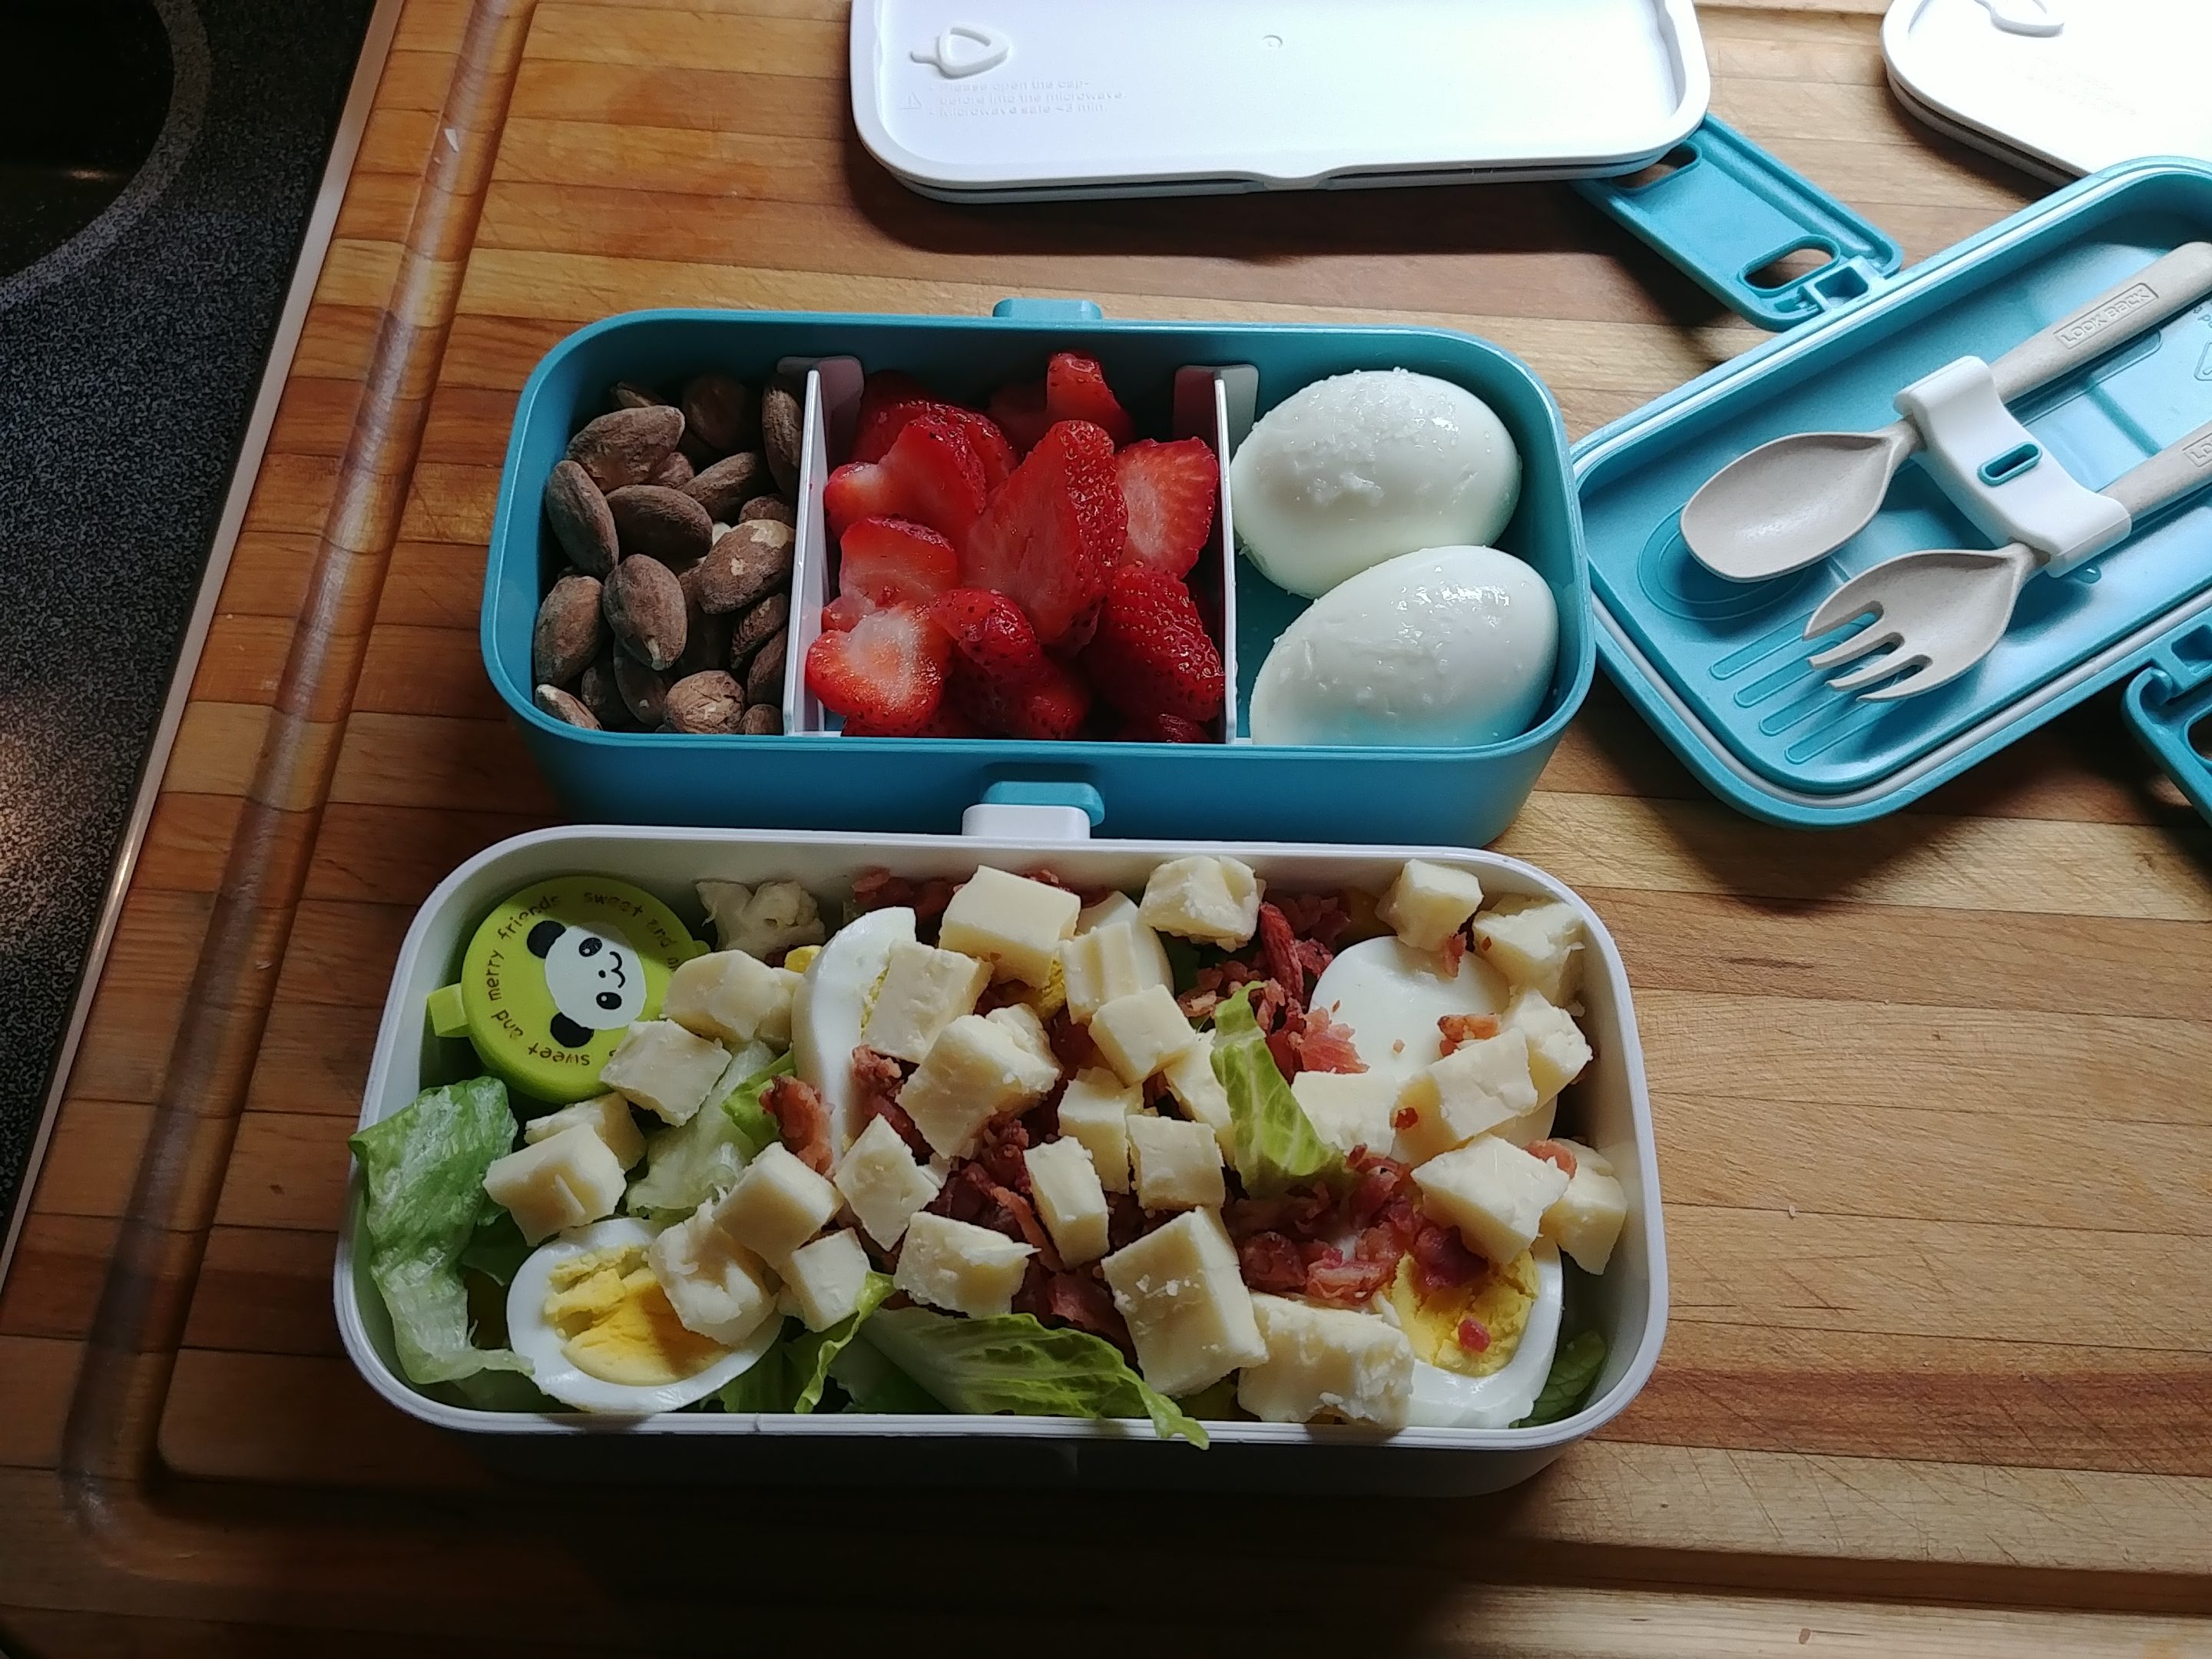
I’m a new grandmother, have done a Grandma Thing, and made up a bunch of food for my daughter and her new family. These are all recipes she is familiar with me serving, but I don’t think I’ve ever made any of these specific dishes with her, so I wrote this up. After doing so, I realized that maybe putting it where it can be found easily online might not be a bad idea.

Really, almost anything that can be cooked in a crock pot can be frozen ahead to be cooked. These are all pretty easy. Conceivably you could freeze up a recipe while cooking another, and slowly stock your freezer that way, if you wanted to. Certainly for those who don’t have a whole hour at a time to spare, that’s a decent way to sneak up on freezer cooking.

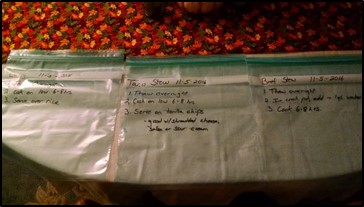
We have also found that these freeze-ahead meals are a good choice if you know anyone who might need some help (illness, new baby, bereavement – anytime you might bring someone food) because they can go in the freezer for a later time. If you do that, make sure you know if they have a slow cooker! I also strongly recommend writing the cooking instructions clearly on the bag.

Beef Stew

  • 1 lb. stew beef, diced
  • 4 medium potatoes, diced
  • 4 large carrots, diced
  • 1 medium onion, diced
  • 1 Tbsp. garlic, minced
  • 1 Tbsp. beef base
  • 2 t each: Parsley, Sage, Rosemary, Thyme (Yes, I went there)
  • ½ c. red wine

Put in a gallon bag. Squeeze the air out. Freeze flat.

To cook, thaw overnight. Put in slow cooker and cook on low 6-8 hours. (Can go longer)

Chicken Vegetable Stew

  • 1 lb. chicken, diced
  • ½ lb. frozen vegetables (don’t knock it. This is cheap and easy)
  • 1 medium onion, diced
  • 1 Tbsp. garlic, minced
  • 1 Tbsp. chicken base
  • 1 28 oz. can crushed tomatoes
  • 2 tsp sage

Put in a gallon bag. Squeeze the air out. Freeze flat.

To cook, thaw overnight. Put in slow cooker with about 1 qt. water, and cook on low 6-8 hours. (Can go longer)

Curry

  • 1 lb. chicken, diced
  • 2 medium potatoes, diced
  • 1 c. plain yogurt
  • 1/4 c. raisins, ground
  • 1/4 c. cashews, ground
  • 1 c. peaches, mango, or apricots
  • 1 15 oz can coconut milk
  • 1 large onions
  • 3T garlic
  • 3T sliced fresh ginger (Powered is also fine)
  • 4 T curry powder
  • ½ can tomato paste

Warning, a slight pain in the ass. But oh so very good.

Put in a gallon bag. Squeeze the air out. Freeze flat.

To cook, thaw overnight. Put in slow cooker and cook on low 6-8 hours. (Can go longer) Serve over rice.

Fifteen Bean Soup

  • 1 lb. Italian sausage, molded into balls, or 1 lb. browned and drained hamburger.
  • ½ lb. mixed beans, cooked. (They sell 13-16 bean mixtures all over the place)
  • 1 28 oz. can crushed tomatoes
  • 1 medium onion, diced
  • 1 T garlic, minced
  • 1 T Chili powder
  • 2 t cumin

Put in a gallon bag. Squeeze the air out. Freeze flat.

To cook, thaw overnight. Put in slow cooker with about 1 qt. water, and cook on low 6-8 hours. (Can go longer)

Spaghetti Sauce

  • 1 lb. Italian sausage, molded into balls, or 1 lb. browned and drained hamburger.
  • 1 28 oz. can crushed tomatoes
  • 1 medium onion, diced
  • 1 T garlic, minced
  • 1 T dried oregano
  • 1 T dried basil

Optional

  • 1 tsp red pepper flakes
  • 1 red pepper, diced. (Yes, I did this to sneak in veggies…. Don’t look at me like that. Spaghetti sauce is a great way to do it, and you’ll try it, too)

Put in a gallon bag. Squeeze the air out. Freeze flat.

To cook, thaw overnight. Put in slow cooker and cook on low 6-8 hours. (Can go longer) Serve over pasta. Or eat a damn bowl of it, why not?

Taco Stew

  • 1 lb. browned and drained hamburger.
  • 1 medium onion, diced
  • 1 T garlic, minced
  • 1 15 oz. can black beans or ½ c. dry black beans, cooked.
  • 1 15 oz can corn
  • ½ small can tomato paste
  • 1 T taco seasoning or 1 T chili powder
  • 2 t cumin

Put in a gallon bag. Squeeze the air out. Freeze flat.

To cook, thaw overnight. Put in slow cooker and cook on low 6-8 hours. (Can go longer). Serve over tortilla chips. Good with shredded cheese, salsa and sour cream.

White Chili

  • 1 lb. chicken, diced
  • 1 medium onion, diced
  • 1 Tbsp. garlic, minced
  • 1 Tbsp. Chicken base
  • 1 small can diced green chili peppers
  • 2 cans white beans or 1 c. dry white beans, cooked.
  • 1 T cumin

Put in a gallon bag. Squeeze the air out. Freeze flat.

To cook, thaw overnight. Put in slow cooker with about 1 qt. water, and cook on low 6-8 hours. (Can go longer)