In Praise of the House Dress

I’ve been experimenting with drafting patterns lately and finally made myself a camp shirt.

Sea Turtles, mate

I realized I could just put a skirt on it and have a shirt dress.

I know. Retro…

I read a Vogue article recently that says that house dresses — comfortable, casual dresses you’d wear around the house but wouldn’t feel weird about answering the door in are fashionable. I’ve never been particularly fashionable, so that made me laugh.

I love a shirt dress in particular. This dress is as comfortable as a caftan, It has pockets. I just throw it on and, boom! I’m put together enough for the day even though I’m spending it with my feet propped up explaining to people that they’re Being Wrong on the Internet.

But yeah, something comfy, moderately tidy, inexpensive*, and a bit pretty does do a lot for my morale even if I’m not going to be doing anything much.

Which is probably why house dresses are making a comeback in the fashion magazines. I have no clue, mind, if Real Women are doing much of this. I seem to recall a good friend of mine wearing a jumper dress on a video conference recently, so maybe it is becoming more of A Thing.

What about you? Do you wear casual dresses, or do you like ’em best for dress up? Or, hey, not at all? To each her own tastes, right?

* The materials for the dress cost less than $25, and I still have a box full of buttons and a bunch of interfacing. If I run across some inexpensive fabric, it’d cost even less to make another one of these babies.

When Capsules are a Mistake

My wardrobe is getting overrun again, and I’m going to have to pare down.

I’ve bought a bunch of pieces without thinking too clearly about how they’ll interact with the rest of my garments. I need to stop doing this.

What’s worse, I’ve taken capsule sewing a little too far in a few instances.


These jackets are essentially the same jacket. I sewed the one on the left with a contrasting band and the one on the right with a band in the same fabric as the body of the jacket.

While the one on the right looks a lot more interesting in a picture, notice that you can only wear it with black, red, or white to have the jacket “work” as a coordinated outfit. Because the band is patterned, it also means that you don’t want to accessorize much at all or the outfit becomes far, far too busy.

As proud as I am of that jacket, in terms of wardrobe coordination, it was a mistake. I do wear red, but I really don’t want my color choices to be mostly black and red. The capsule consisted of a skirt in plain red, a skirt and pants in plain black, and three shells – red, the band pattern and black. As long as I dressed within that capsule, it looked fine. But that was too limited. If I wanted other colors, I’d need to make another capsule.

The jacket on the right? That one I can dress up with scarves, or wear it plain. I can wear any color that will go with black (all of them) and the outfit will be work.

The reality is that as much as I love an interchangeable wardrobe, I need to sew with buying clothes more in mind. While I get a kick out of sewing my own garments, my time is more limited these days. I am much more likely to buy something and alter it to suit my tastes better. (I’m looking at you, designers who don’t put waist darts or princess seams in your torsos for plus-sized clothing!)

I also need to be pickier and buy clothes with my closet in mind. I have about five or six pieces I never wear because they go with nothing else and while they looked great on the plus sized model in the image, even with alteration, they just look sloppy on me.

Rice Bag Heating Pad

I live in Northern New England. While Autumn hasn’t been particularly cold this year, nights are definitely getting colder. I am too cheap to heat the house much, so I rely on many things to keep warm – hand-knit wool sweaters, socks and shawls, hot soups for dinner and hot drinks.

They’re all nice, but sometimes the cold gets to be a bit much. That’s when I bring out another weapon in my arsenal against the cold. This is the Rice Bag Heating Pad.

Heat this baby up in the microwave, and you can warm your bed, put it at your feet and cover with a blanket or use like you would use any heating pad for aches and pains.

It’s easy to make and incredibly useful. While you can make it exactly according to the directions given, the directions are mostly guidelines. There are only a couple of things you really want to be cautious about and I’ll talk about that.

How to Make a Rice Bag Heating Pad

Materials Needed

  • ¾ yard of 45″ wide cotton fabric. You do not want to use synthetic fibers for this, as they can melt. Quilting cotton is cheap enough. Use that.
  • Thread that will match or contrast nicely with fabric, as it will show when you sew the channels.
  • 4 2/3 cups of rice (The third of a cup thing was only because I happened to grab a 1/3 c measuring cup for this, but it’s about right for the size of the pad and the channels I’ve sewn)

Cutting the Fabric

I actually made a pattern for this just because I was doing this blog post. In real life, I would have simply measured the piece and marked it with tailor’s chalk.

  • Fold the fabric lengthwise.
  • Cut 18″ wide by 13″ long on the fold. You’ll have a piece that’s 18″x26″ when unfolded.

Sewing the bag

  • Turn fabric wrong side up and press.
  • At each 18″ end fold down about an inch and press.
  • Sew folded edges down. You’ll want to do this because otherwise you’ll have to sew a raw edge. This makes it neater.

  • With right sides together, sew a not too narrow seam at both 13″ edges to make a bag.
  • Turn right side out and press. (You always press your seams, right? <stern look>)

  • Using tailor’s chalk, mark channels at about 2 ½” wide. Yes, you’re marking and sewing the right side of the fabric. That’s why you use tailor’s chalk or something that rubs off easily. This doesn’t need to be absolutely exact. It is only necessary that the channels be wide enough to hold decent volume of rice to hold heat, but still distribute it evenly. Getting right angles well is a bonus. I eyeballed it and totally didn’t.

  • Sew along the chalk marks to create channels. This is why you either want thread that makes an attractive contrast or is the same color as the fabric. It’s going to show.

Filling the bag

You don’t actually have to use rice. I’ve known of people using buckwheat hulls and other materials. It’s only that the materials should be able to take being heated in a microwave without catching on fire. If you use rice, make absolutely sure you also put a mug with an inch or so of water in the microwave to heat along with it. Otherwise, yes, you absolutely can start a fire. What’s worse, that fire could start while you’re snoozing under that toasty blanket. Don’t be stupid. Heat it with some steam. You have been warned.

Fill each channel with about 2/3 c of rice. I don’t really recommend eschewing a funnel unless you’re infinitely neater-handed than I am. I’d get rice everywhere if I tried that.

Like my fancy funnel? I have one for liquids, but the mouth is a hair too narrow for rice to flow in well. Never improvised a day in my life…

Now, all you have to do is sew down the open end. Because I’d prepped the edges, I didn’t get too elaborate with this, but just sewed a double seam down the open edge. I suppose if you really wanted to live dangerously, you could just do the single edge. I figure three minutes of sewing keeps me from possibly waking up with a bed full of rice. A chacun son goût.

You will have to experiment a little to see how long you need to put it in the microwave to heat it up. If you’ve heated it enough that it is uncomfortable on bare skin, you’ve heated it too much. Depending on microwave power 3-4 minutes is usually plenty. Remember what I said about using the mug with a little water to heat with it. I was not kidding about that!

If you have any questions, lemme know.

Cargo Scarf and Purse Freedom

cargoscarf-1A friend of mine pointed me to the cargo scarf as a possible project some years ago. I’d always intended to make one and I guess tonight was the night.

I love scarves and wear them all the time. I also do not particularly love purses, though I do carry them. While I like pockets, the reality of women’s clothing is that if you buy it, you often cannot find any with good pockets.

This is an excellent compromise.

This is just a very long scarf that you can wrap around your neck (or drape around your neckline in my case, as I do not like anything close to my neck) and just wear as if it is a normal scarf. The pockets don’t show on the outside.

The instructions in the link I give encourage you to make custom pockets to fit the gear you intend to carry, which I did. I have a pocket for a phone, keys, iPod Nano, and thin wallet.

I was dubious, but after I tried it on, I really like this. I have some jackets and skirts that have no pockets, so the idea that I can have a scarf that’s essentially pockets makes me unutterably happy. It drapes well, and lies neatly. You’d never guess that the scarf has stuff in it when you wear it.

It was fairly easy to make. You’ll want to buy basic 45″ fabric – half a yard in your fashion fabric and half a yard in your backing fabric. The original instructions encourage polar fleece or some other warm fabric. I just used quilting cotton, as I’ll likely wear this indoors quite a bit. Then you just design patch pockets for the gear you want to carry. I suppose given that it is two layers of fabric, you could do welt pockets, but I then the outline of your stuff would show through the single layer of fabric, I think. As it is, it’s hard to tell you’re not wearing just an ordinary scarf.

The original instructions also called for making a pen holder and adding a d-ring for keys. I was uncomfortable with the key on the outside design, so made it with a pocket for keys, instead.

What I didn’t do, and I’m going to have to go back and do, is have pocket closures. I think I’m merely going to get some iron-on Velcro to hold the pockets shut, but you could design the pockets with almost any closures you wanted.

It’s also comfortable to wear. While I do own some pocket intensive jackets of various sorts and love them, I also like this as a purse alternative. I expect I’m going to make several to suit various outfits I have.

Why I Sew

1920I used to say that I learned to sew in self-defense because I am fat and like to dress nicely.

While there’s some truth in that, now that I know how to sew well enough that I get compliments on my clothing on a pretty regular basis, there’s more to it. While I probably would buy more RTW (ready to wear) clothing than I do now, I think I would still sew a lot of my own wardrobe because… Well…

I so seldom find anything in a store that truly suits me and my tastes. The style might be right (it’s very hard to go wrong with a well-fitting shell and tailored jacket as a design), but this season’s colors and prints might not be what I like. Or the colors are awesome, but I dislike the design elements. Or, since I prefer coordinating wardrobes because I’d rather just be able to grab stuff from my closet and not think too much about it once I’ve already put my hard-earned money into it, I can’t seem to find pieces that coordinate well to create more than a couple of looks for less than $300.

Accessories help. I spent last winter on a project that left me no time for sewing. I bought five pair of pants (three black, two gray), four skirts (two black, two gray) and two jackets (one black and one gray) from a fat lady retailer that I retailored a little (gotta love princess seams!) and wore with some shells I’d already made and mixed it up with scarves. While a bit boring after a whole winter, I’m good enough at accessories, it worked okay.

I started looking for clothes that would be good for summer office wear and was getting frustrated with what was being offered (what designers are offering as appropriate office wear has me reaching for the smelling salts and clutching my pearls, it really does), and as a bit of a lark, tried look2288ing in the “normal” size departments.

That was also a big bowl of nope (barring suits. You can ruin a suit, but it takes a special effort). The stuff I really like… Well, apparently I have refined tastes, just sayin’. I don’t think of my fashion sense as anything but boringly practical, but apparently boringly practical has one heck of a high price tag.

I think my departure from the fashion industry at this stage in the game is that I can’t afford RTW that suits my tastes as well as stuff I can make.

Seven Hundred Fifty Words

Today’s practice isn’t going to be fiction. That’s mostly because I don’t think I’m at the point where I’m up for writing a short story a day. I think one a week is really about the extent of what I’m up for. So, I need to come up with some ideas for one for next Saturday. I choose Saturday because I feel like I can take more time over it.

I bought one of those Timex Ironman watches — not because I am even vaguely interested in doing a triathlon (well, MAYBE one of those sprint distance one… Maybe. but probably not) but because I wanted a waterproof watch that could keep track of laps. I’m always concerned my time is inaccurate and that I’m fooling myself because I’m losing count of laps and stuff.

Nope. Even looking at the clock when I start and stop a swim has been pretty accurate. Even so, the watch is nice, as I can time my intervals and get a better idea of how I’m doing in my workout as I am going along without stopping to squint at a clock.

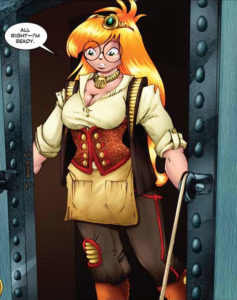
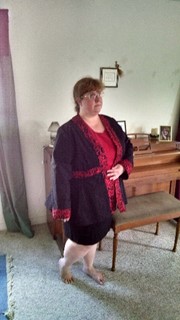
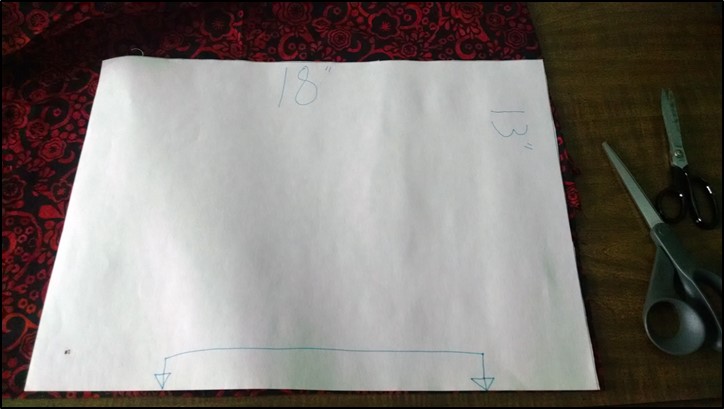
I’m going to be cutting out a corset today. Believe it or not, they’re not too hard to make once you get the measurements down. The Elizabethan Custom Corset Pattern Generator  works amazingly well to create a pretty serviceable, simple corset, as long as your measurements are accurate.The real issue is deciding where to put the boning and getting the edging neat. All you really do is make a canvas shell with channels in which to put the boning, sew the fashion fabric to the shell, use some sort of edge binding (I use quilting binding) around the edges, hammer in the grommets if you don’t care about period (I don’t), or make buttonholes for the lacing if you do care, and go. It really is something I’d use to teach someone who was interested in costuming to sew on. Yes, I really would.

I am hoping to finish the corset this week, and then get started on some steampunk garb for my husband. Though, because I am a big ole meanie, he’s going to be cutting out the fabric and lining himself. (Hates cutting out patterns we does. We hates it).

We’re going to be actors in a live-action Steampunk RPG at Carnage Con. I’m looking forward to it. I’ve actually never done anything like this before, so I hope it’ll work out well. I’m thinking mostly Diamond Age by Neal Stephenson for my Steampunk ideas, though until I see the script, I can’t be sure.

Yes, I’m making an Elizabethan corset as part of a Steampunk (which is usually late Victorian) costume. My argument is mostly that if Agatha Heterodyne, who is the quintessence of a female steampunk archetype, can wear what is essentially a renfair bodice during labwork, I should be good with a corset of slightly the wrong shape as long as I pair it with a skirt with the right shape bustle and a more Victorian look to a jacket and hat.

The thing with costuming of this sort is that I actually DO know something about period costuming, and I need to turn that off for this. Steampunk might take its inspiration from the late Victorian era, but from what I’ve found on the web, inspiration is really all it is.

Which is also fine. You really don’t see all that much period clothing at renfaires, or many historical reenactments, either. It’s like historical fiction. At a certain point you do have to pick and choose to decide how you want to present something.

For that matter, I wouldn’t want to wear an actual Victorian outfit with all the proper underpinnings anyway. That would be deucedly uncomfortable unless we were looking at some sort of Pre-Raphaelite reform dress, anyway. Which would totally not work in for a Steampunk costume, or I’d be doing it.

Still need to think about an idea for another story. I’d do a slice of life, but I can’t…

Never mind. Oh yes, I can.

You know, for someone who doesn’t read much horror at all, I really do come up with some creepy-ass ideas for stories. I wonder how many authors don’t read much of the genre they actually write. I’ve gotten advice that said to write what you like to read, but it seems I just don’t do that.

I can see it now, I’m going to be releasing this book of feminist horror stories. *facepalm* It would totally work.

Not Quite Rags

I don’t use paper towels to clean up anything but mess from a pet. While yes, you could call it an environmental thing, I use cloth for cleaning the same as I use cloth napkins for everyday.

I find buying stuff specifically to throw away a waste of money. If you can safely wash it and reuse it for cleaning purposes, it’s cheaper to do so. You can find all kinds of cleaning cloths out there that’ll last years.

I don’t find most commercial cleaning cloths sturdy enough for my liking, so I make my own out of worn-out towels. I have a couple of sets that have been getting frayed around the edges and have ample newer ones, so it’s time to make a cleaning cloth.

I got the idea from Is There Life After Housework? by Don Aslett. You take a rectangular piece of cloth – preferably something strong and absorbent. Old cotton towels are great for this, and so are old diapers.

The cool part is that instead of rags, you make a tube out of the cloth. By folding, you get a pretty sturdy cleaning surface, and when it gets a bit dirty, you can refold and turn it inside out for fresher cleaning surfaces. When you’re done, toss in the wash, no biggie.

Since I use towels for this, I’ll show you how I do it.


So by folding a towel in half widthwise, cutting then doing the same again to the two halves you’ve generated, then cutting those four pieces in half again, you can get eight pieces of cloth out of your old towel.

And there’s no reason in the world not to go ahead and use them as cleanin g rags right then, of course. If that’s your thing, go for it.

I like the tubes, so I go a little further and sew up these babies.
I do use a zig-zag stitch along the long edge, or use a serger to finish what will be the open edges of the tubes. It makes them last longer instead of falling apart from fraying and leaving fluff everywhere. Notice I used black thread on the old pink towels I used. I confess this was not done for contrast and an example, but out of sheer laziness because I didn’t feel like bothering to match the thread for cleaning supplies. You want yours to look pretty, go ahead and show me up. J

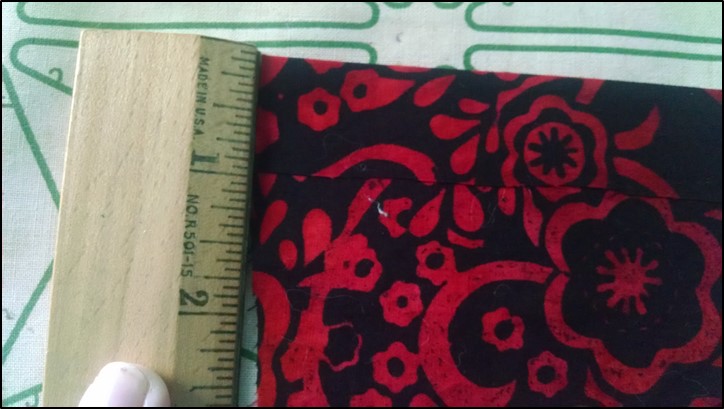
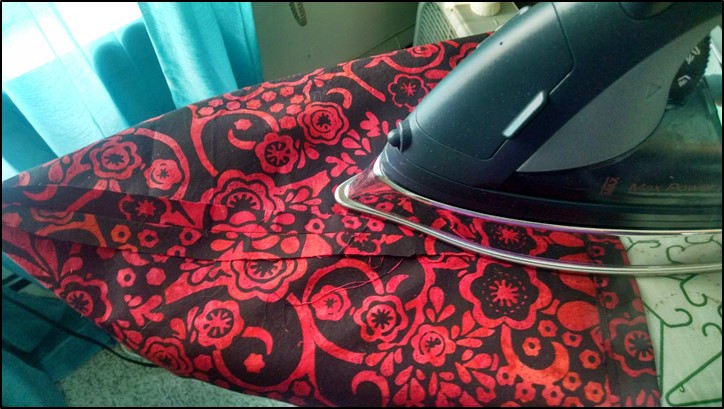
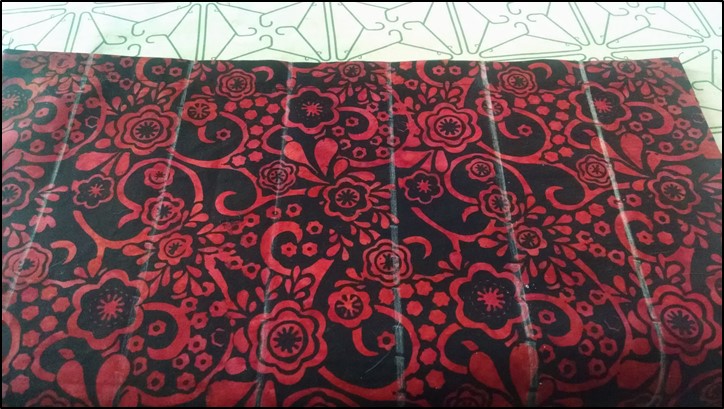
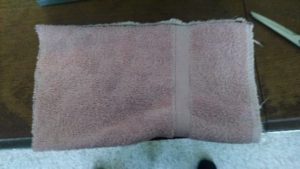
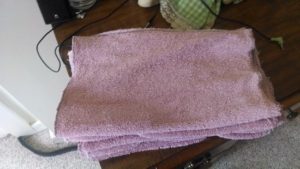
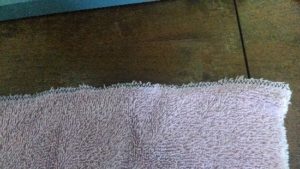
After I’ve finished the long edges, I go ahead and sew them into tubes using a zig-zag stitch. I do this for strong seam with a bit of self-finishing on one go. They’re meant or cleaning, so I don’t feel like it’s necessary to spend an extraordinary amount of time on them. Eight in a half hour is plenty enough time to spend.

These cloths also make great potholders. The double layer of thick cotton cloth is pretty good at protecting from heat.

As long as it’s not damp.

Here’s the set I made today. Did it because most of the old ones I made ten years ago have frayed apart from heavy use and I’m on a spring cleaning spree.

Knee Socks and Garters

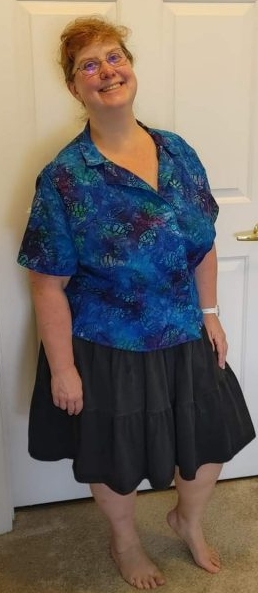
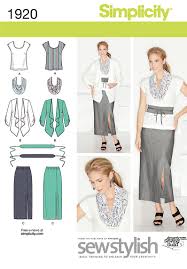
I like to wear skirts, especially broomstick skirt. Yes, I know that it means I’m not fashionable. I don’t owe the world fashionable, but I think I owe me what I like. So, yeah, broomstick skirts.

I also like to wear them in the winter. I live in Northern New England. So, you can start to see a bit of a problem, right?

Now, you can wear long johns under a skirt, and certainly you’re warm. But white long johns peeking out underneath my skirt hem offends my limited fashion sense, and I’m not hipster enough to want to wear colorful leggings under a skirt. Sure, it can look cute. It just doesn’t happen to be my thing.

My solution is knee socks. I knit, so why not, right? They fit over the long johns, and add some extra warmth (ahhh, wool socks).

What they don’t do all that great on the rounded limb is bloody well stay up.

Now, when I was a Brownie and Girl Scout back when dinosaurs roamed the Earth, the official uniform included a knee-length jumper option with knee socks and these little sock garters with a flappy thing that I’m too lazy to look up the appropriate term for. Scottish men in formal kilts wear them. I’m sure some of my costumer readers know this term off the tops of their heads.*

I could also sew the elastic into the sock. I know some knitters knit elastic the last few inches at the top, but didn’t have any thin elastic on hand or a way to get it, so I didn’t try that method.

So now, I am wondering whether to make sock garters or sew an elastic band into the sock. If I sew it into the sock, the sock would have to get lost to lose the garters, but it’s only good for that one sock. If I make garters, I only have to have a pair or two.

I’m probably going to go with garters, just for fun. Maybe even a Maureen Johnson version, but they’d have to be blue instead of green. 😉

_____________________________________________

* Yes, it would have been quicker to look it up than write what I did. I like to indulge Geek Answer Syndrome when I can. Call it a public service. Ever kind, considerate and thoughtful, that’s me!

Saf-t-Pockets Flounce About Jacket

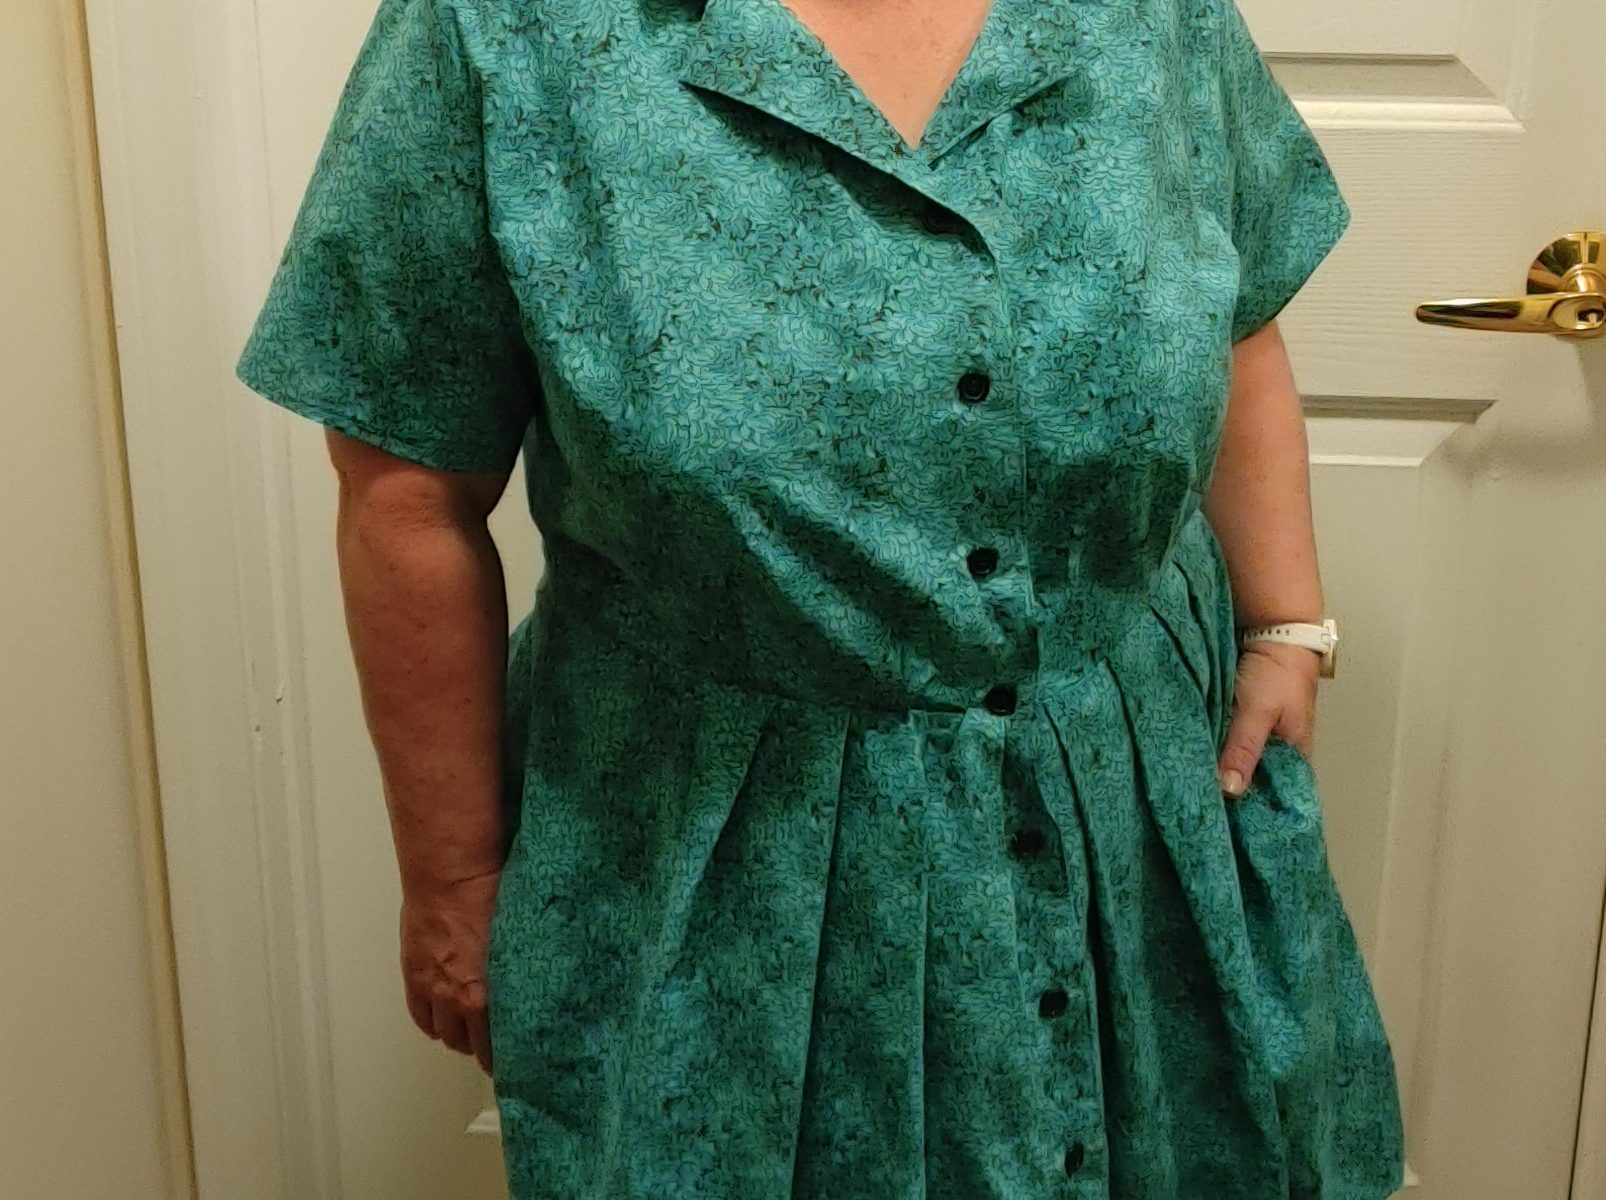
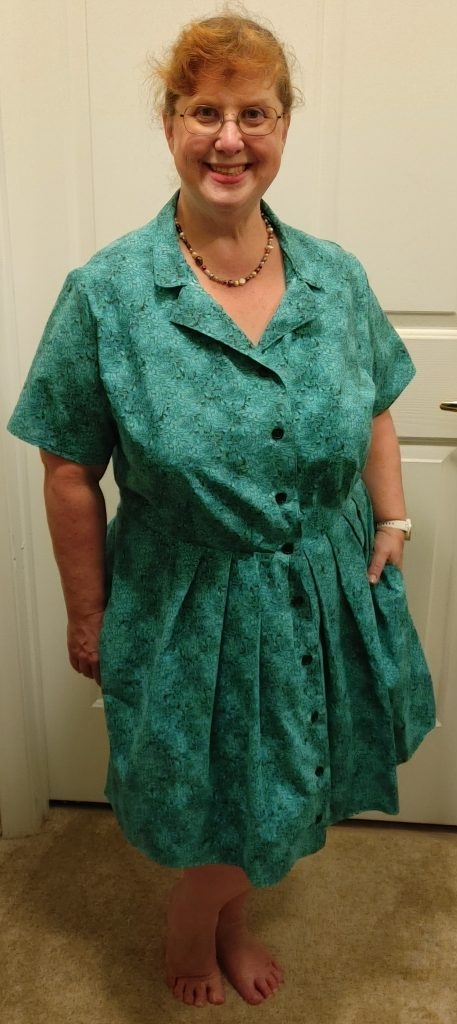
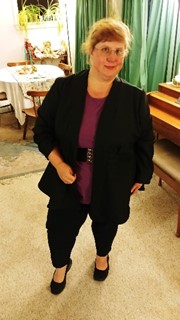
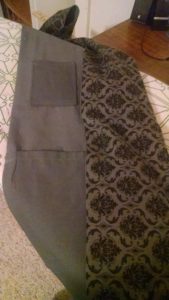
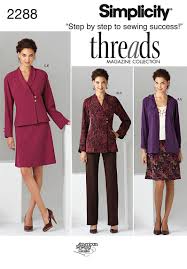
I’m four garments in to a nine garment wardrobe capsule. Yes, I’ll post the composite photo when I’m done, but I wanted to talk a bit about the jacket I just completed.

I’ve been eyeing the Saf-t-Pockets patterns for years. The idea behind most of the garments designed by the company is to have an attractive garment with enough pockets to carry your stuff without having to resort to carrying a purse. There are garments with visible pockets, but the one I made has all the pockets hidden on the inside. Yes, I like gadgety cleverness of design even in clothes. Stop looking at me like that. I can’t help it. I was scared of trying it, though, because I was worried it was above my sewing abilities. You’d want a year or two of sewing under your belt before you tried it solo, but I wouldn’t have a problem coaching a beginner through this.

I just wore this gadgety goodness to a business meeting and a few errands. I am in love with the design.

There are four internal pockets to the Flounce About Jacket. Two of them are fairly commodious. They fit anything from a smartphone and keys to a Kindle with no real problems. Yes, this means you can slip a steno pad in there to take notes! The other two pockets are smaller – about the right size for a business card or credit card.

So, I didn’t need to take a purse to my business meeting.

Now, I’m sure you’re saying, “Yeah, but a lot of pockets make the garment bulky and clumsy. We all know what a cargo vest looks like.”

And you’d be wrong. This is the genius of the design. Yes, those pockets are big and can hold a lot of stuff. But they’re not sewn into the front panels of the garment. They hang from the front band so that the drape of the flounce skims over it without ever making it clear that there’s pockets in there with lots of stuff inside! The pockets also have a nice velcro closure, which makes them useful to carry more valuable things. This is smart designing.

I’ll probably make another one of these jackets in a heavier material as more of an inter-season coat and travel, as this is sheer genius.

Sea Salwar


The suit is nothing special.  It’s pretty much the same thing I made as for the purple and gold on with the bird motif.  But oh, the colors.  These are my favorite colors in the whole world.  If it reminds you of a Caribbean sea, yeppers.  That’s what I like.

I did make the sleeve slightly looser at the cuff as I like to push up my sleeves when I’m cooking.

I had been instructed to lose the glasses for the shoot.  Okay, fine, maybe I should go back to wearing contact lenses more often…