

My husband, son and I took about an hour to make dinner for ten weeknights. Yep, that’s right. We were able to do that in an hour. How?
Well, certainly teamwork counts, but it is also because when we’re really busy and we rely on the crock pot most weeknights. None of us really wants to come home after a long day and cook, and all of us have busy days.
So we take an hour an prep a few Bags o’ Dinner on various weekends. To make this go smoothly, what we will usually do is choose five recipes that we like and work well in the crock pot, then double them so we’re doing two bags of each. Spend two or three weekend mornings doing that, and you’re all stocked up with an adequate meal variety for a long time.

When we decide on meals, I will often make a list of what goes in each recipe so that we can streamline prep work. Ferinstance, every meal we chose to make had onion in it. It just made sense to figure out how many onions those ten bags needed and do ’em all at once. While this sort of prep work does use up all your various bowls to hold chopped and prepared ingredients, it makes it a lot easier when it comes to assembling those gallon freezer bags.

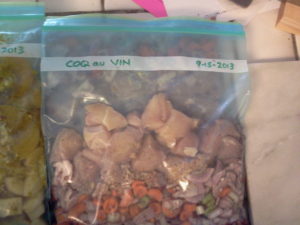
Once everything is chopped, any hamburger is browned and drained (I tried it without the browning step once and found the meals far too greasy), you can start adding ingredients to the bags. I go with heavy things first like beans or meat. It helps the bags stand up and makes adding other ingredients much easier.
Ideally, I try to make meals with several ingredients all of them will have, so I would do a hamburger session, then a chicken session. I didn’t do that this time, and just made two meals based on hamburger and three based on chicken.
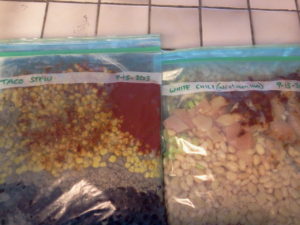
Some people use crock pot liner bags and freeze their meals in the shape of their crock. If that’s what works for you, I see no reason not to run with it. I don’t do that, though. I freeze my meals flat. Since I don’t use a chest freezer, I need to be able to fit all the meals I make in the freezer on top of the fridge. Flat works better for that. I am very careful to label what we do. After it’s frozen, you’ll have a devil of a time telling the difference between three or four tomato-sauce based meals. Don’t try. Label them.
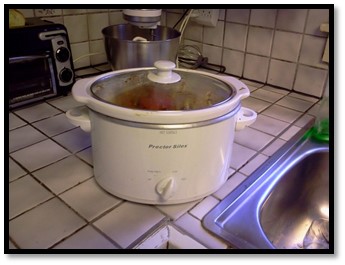
I usually take a meal out to thaw the night before, then dump it in the crock pot before work in the morning, turn it on low and forget about it until I get home. Lately, if the meal needs to be served with rice or pasta, my son will take care of making that in time for his father and I get to get home from work. If you don’t have someone to make these things for you, yes, a little prep work will need to happen before dinner. Just not much.
So, how do these meals taste?

They’re good. Are they like the most amazing gourmet treats you could possibly sink your teeth into? Of course not.* Don’t be foolish. This is basic, everyday dinner -peasant cooking that’s stewed all day, and that’s what it tastes like. Then again, ratatouille is a peasant dish, and so are many meals that taste pretty damn good when they’ve cooked a long time. If you insist on gourmet cooking every night, this is not for you. This is your guardian against fast food because you’re too damn tired to cook. This is when you don’t want to (or can’t) spend a lot of money on restaurants, but just don’t have the time to make something every night. For my family, we really either do this or have a rota for who wears the chef’s hat that night. We’d all rather just take an hour and get it done than have to cook every third night.
People keep asking for recipes and the link has a couple. But really, anything that works in a crockpot will work with this. Some people say that potato-based recipes don’t work well when you freeze them, but my curry has potatoes in it and does great. So does the beef stew we made last week.
However, if you need recipes or shopping lists, you can check these links out. The taco stew came from one of them, though I forget which. Happy hunting! 🙂
___________________
*Except for the curry. The curry is awesome.
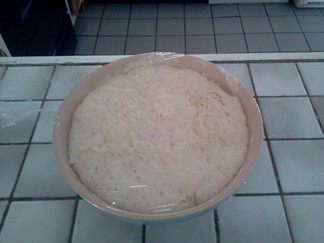 So I decided to take a little risk and try making “real” sourdough break without any added baker’s yeast. I mixed up the dough late at night and when I came down the next morning, I saw that Horace had really been flexing his muscles. That’s a better rise than I usually get out of the dough I make this way with baker’s yeast.
 As you can see, Horace really did his job on this loaf. That’s as fine a sourdough loaf as ever I did see. I just took this out of the oven and haven’t tasted it yet (other than breaking off a bit of crust), but this looks like the real thing. Well-risen, crusty and delicious.

 I like grapefruit. For whatever reason I hadn’t bought them for several years. No, it’s not that I’m the only person in the house who is really fond of citrus fruit. I buy cases of clementines and gorge on them without a qualm every winter. I just… well, haven’t bought them.

 I like to do


